
Learn how to tie the Pink Pup Streamer, including step-by-step instructions, a video tutorial, pictures, and much more. Improve your fly-tying skills here.
Did you find this video helpful? We've got hundreds more just like it. Subscribe to Trident's YouTube Channel and enhance your fly-tying skills. New videos are posted frequently in a variety of different patterns.
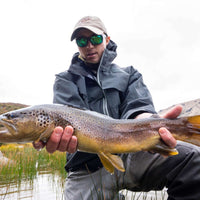
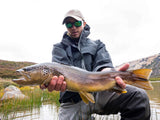
The Pink Pup streamer fly is a classic streamer pattern developed in the 1940s. Using minimal materials, this is a quick and easy tie that can be deadly for trout, salmon, and even bass. Depending on the color and size of the pattern, this fly can imitate a multitude of juvenile fish or baitfish. If you like easy patterns that are time-tested, consider adding some Pink Pup streamers to your fly box.
We've put together a kit that contains all the materials you need to tie this exact fly pattern.
Click the button below to shop the selection.
Material list:
- Hook: Daiichi 2220 4X-Long Streamer Hook (size: 6)
- Thread: Danville 6/0 (70 Denier) Flymaster Thread (color: black)
- Rib: UNI Clear Mylar Tinsel (size: 1/32, color: silver/gold)
- Body: Danville Acetate Floss (color: black)
- Wing: Hareline Large Northern Bucktail (color: yellow, white, red)
Video Transcript
Hello, I'm Carl at Trident Fly Fishing and today we're going to tie the Pink Pup. This fly was invented by Mark Burlingame in the 1940s. It's a rival to the well-known Mickey Finn streamer and it's a great fly for both trout and landlocked salmon. It's usually tied in sizes 4 through 10.
The hook we're going to use today is a Daiichi 2220 size 6 - that's their 4X-long streamer hook - and the thread we're going to use today is Danville's 6/0 in black. We'll start our thread back here at the bend of the hook and form our jam knot where we're going to tie in our first material, which is going to be the rib.
The rib is some UNI Mylar silver/gold, size 1/32. Cut off a piece here. We want the silver side to show, so we'll tie it in with the gold side facing out. We want nice, tight, even turns so the tinsel lays down nice and flat for us. We're going to run this only about halfway up the hook shank where we'll tie in our body material. That looks about right. Get this out of our way in the material holder.
Next we're going to tie in some Danville's 4-strand floss in black. A little easier to work with if you wet your fingers to start with, I've found. Clip this off and get it even. And now run the thread forward. About an eye length and a half behind the hook eye we're going to stop and save our work with a quick whip finish.
We're going to use the rotary function of the vise to form the body. When we reach our tie-in point, we'll capture that floss material with a couple of free wraps. Get rid of the excess. Then bring our rib up in touching turns until we reach the floss material, and then open turns from there. Take your time and make them even. Get rid of the excess and neaten that up a bit.
Now we'll tie in the first wing material. There are three pieces to this wing. The first piece is just some yellow bucktail - we want this to be pretty wispy. Just past the bend of the hook we're going to tie this in. Looks good. Cut off the excess, jump the thread forward, and wrap back to the tie-in point.
The next color is red. Same thing, not too much. Sometimes it's easier to stack this in your hands than in a stacker because it's so twisty it just doesn't stack well. That's about where we want it, and we want it the same length as the yellow. Tie it in right on top.
Last is some tan or brown. I like to use the hair that's on the back of a white bucktail - it's got a little more color variation to it, with some tans and browns and blacks in it. Again, the same amount. We want it to be pretty wispy so that it has lots of movement. Nice tight turns - it's slippery material. Cut off the excess, jump the thread up to the eye, and then wrap backwards to cover all the material.
When we're happy with the shape of the head, take out the whip finish tool and do a four or five turn whip finish. Cut the thread and add some head cement.
Please feel free to add comments at the bottom of the page, and don't forget to hit that subscribe button to view all the new content here at Trident Fly Fishing. Thanks for watching. I hope to see you again next time.
Comments
(0)No comments yet. Be the first!