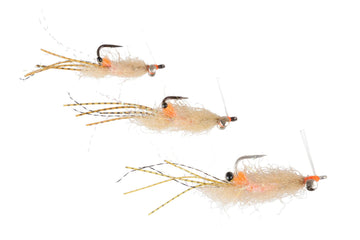
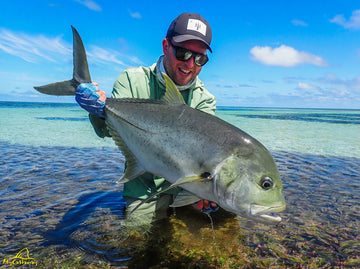
Here at Trident Fly Fishing, we love patterns that blur the line between saltwater and freshwater fishing, and few flies do that better than the Palolo Worm. Born from the legendary Florida Keys tarpon fishery, this fly was designed to imitate the Palolo worm - a marine polychaete worm that hatches en masse from coral reefs each spring, sending tarpon into an all-out feeding frenzy. When the hatch is on, these fish become almost impossible to stop, and having a well-tied Palolo Worm in your box can mean the difference between a fish of a lifetime and a story about the one that got away.
What makes the Palolo Worm such a compelling tie is its elegant simplicity and the way each material serves a deliberate purpose. The rabbit strip tail delivers lifelike undulation in the water, the saddle hackle collar creates a natural veiling effect that hides the hook while maintaining movement, and the micro chenille body gives the fly a segmented, worm-like profile that triggers strikes from a wide range of species. Ryan ties this pattern on a Gamakatsu SC15 1/0 hook - a battle-tested choice for fish that hit hard and run hard.
Don't let the saltwater origins of this fly keep it out of your freshwater box. The Palolo Worm's coral color profile and undulating rabbit strip tail make it a phenomenal choice for smallmouth and largemouth bass, and striper anglers across the Northeast have been fishing variations of this pattern for years. Whether you're poling the flats of the Keys or swinging a fly through a rocky river current, this is one pattern worth mastering. Follow along as Ryan breaks down every step of the tie, including a key foul guard technique that will improve any rabbit strip fly you tie.
Full Video Transcript
Hey everybody, it's Ryan again with Trident Fly Fishing. Today I'm going to be tying the Palolo Worm Fly, which is a famous [music] Oceanside Keys tarpon fly, but don't let that stop you from tying it if you're a freshwater guy. [music] This is a great smallmouth, largemouth fly. It's also a great striper fly. So, we're going to tie the Palolo Worm Fly on a 1 aught Gamakatsu SC15. This is a really sticky hook that has a reputation of holding up for a heavy fish. So, I'm going to start by tying in my thread. I'm using 6 aught Vevus thread in this sort of yellow chartreuse color just so I can kind of see it well. This is a pretty small fly. I like this bright thread at the front right behind the eye so I can it gives me like a bit of a a spotting device. I can see this thread pretty well in clear water. So, I'm going to tie in right above the hook point. If you draw an imaginary line from the hook point up to the shank, I'm going to work back towards the bend of the hook a little bit. And then the first thing we're going to the the tail of the worm fly, we're going to use rabbit strip for that. It has a tendency to foul if you don't use a foul guard. So, I've just cut off a shank of 20 lb monofilament. The length is about a little over two and it's about two and a half shank lengths of this monofilament. You can see there's like a natural bow to the monofilament. I'm going to use that to my advantage. In other words, I'm not going to tie it in like this. I want it to go upwards like sort of the cup is like this and I'm going to tie this in and I'm going to show you how to use this as a way to prevent your rabbit strip tails, whether you're tying this fly or a different rabbit strip fly, from fouling. So, I'm going to give about a half inch or so, 3/4 of an inch of monofilament laying around the thread wraps I just made. Couple loose wraps and then I'm going to really crank this down. I had a batch of flies I sent to a guy in Florida. I did not cinch this guard down well enough and they kept popping off of the fly. That wasn't good. So, I really make sure that I'm cinching that down. You can test it. You can really pull on that. Right? If I can't pull that out, I'm in a good shape. And notice that that it has that shape where it's kind of pointing up. That's going to be great for supporting the fly. So, the tail tail material today I'm using Hairline's rabbit strips. These are coral colored so they're kind of like a reddish orange. This is very natural color similar to the Palolo worms when they hatch up out of the coral. This is a similar color to them. Some anglers like to tie with the fibers facing up and leather down. Some anglers like to tie with the leather facing up, feathers facing down, or or fibers facing down. I haven't found a big difference in the way the the fish respond to the fly. I prefer to have the leather down. That's just my preference. In this case, I'm taking one end of the rabbit strip. It's this nice straight off straightened edge. I'm using my left pointer finger and thumb to kind of just position the leather right on top. Great. Tying that in a little bit. Same idea. You want to make sure that's pretty cinched down so it's not going to go anywhere. Now, I'm going to trim the tail. I'm going to go I would say about again about two shank lengths back. And instead of cutting down over the top of the fibers, I'm going to put my the tip of my scissors through and make a straight cut that way. Okay, so I have that nice straight edge there on the leather. Now, this is a trick that will help make this process a little bit easier. Essentially, I need this monofilament to go through the leather on the rabbit strip. The easiest way to do that is to grab the leather strip, flip your vise around, and use the hook point to create a little hole here. So, I'm going to go right in the middle of that leather. Poking through like so. And now I can kind of eyeball where that hole is. It wasn't perfectly in the middle, but it'll work. I'm pushing the monofilament through that spot, threading the tail back down. And I'm pulling, rather than having this big loop like that, I'm pulling this forward all the way. You don't want to pull it so it kicks the tail up or crimps the tail like that. You want the tail to be straight. But you want to kind of minimize the size of that loop. And once I do that, I can use my pointer finger and thumb to pinch that line just like that. Monofilament has memory so see how that that narrowed that bulky loop. I pinched it and now it's nice and streamline with the tail. So, I'm going to use my left hand pointer finger and thumb to hold that and I'm going to tie in that thread right on top of my existing tie in points. And this is again, this is a really important bit of thread wrap cuz I I want to make sure I capture that and it doesn't come off the end. I can use my scissors and pull a little bit. If you pull and that top piece flies off, it just means you have to tie it in a little bit stronger. There's my tail. I'm going to cut off that tag. Great. Next step is I'm going to create a little bit of a collar. The collar is going to help veil some of this material, some of the hook itself, and the thread wraps. The collar today we're going to be using strung saddle hackle. This is So, it's like olive with a little bit of lighter shade, almost like a yellowish shade. I'm going to find two two feathers that are matching as far as width. I want to have some of this fluffy material. You'll notice the color change in the quill itself. This thick white quill is really brittle and if you try to wrap that or palmer on your shank, it's going to probably break. So, I'm going to move to where that kind of transitions into this thinner quill material right about there. Same thing on the other feather. I'm going to match those up. And I'm going to tie this in with that fluffy material. Um that end there. And you notice I pulled off just a little bit of material so I could see those quills. Tie it in like so. There's a bit of a cliff here from my tying point. I'm going to try to make sure I capture those. And now what I'm going to do is I'm going to palmer this material and pull it back as I wrap. So, what I'm doing is creating this nice veil. And I have to be a little bit careful because again, there's a bit of a cliff, a drop-off from the thread wraps down to the hook point or to the hook shank I should say. So, I'm really using my left hand to pull those fibers back to cover that up. Great. Again, I'm using my fingers to pull those fibers back and then once I get in front of that bump that I made with my thread wraps from tying in the the foul guard, I'm going to use my left hand. I'm pulling I'm kind of holding the saddle hackles with some tension with my right hand or my my my scissor hand. I'm going to use my left hand or my off hand to flip that thread up and over couple times just like so. Now, I'm going to pull the fibers back, tie them in in front. And again, I'm going to pull everything back and do a couple thread wraps up onto that material onto that saddle to really make sure we're locked in. We have this little bit of a bump here, but that's going to go away when I add the chenille at the end. So, now that's nice and tied in. I can pluck these right out. Now, I have my tail. I have my foul guard in there and I have this nice veil that veils the hook nicely. You can see that the only part of the hook that's showing is really the point, the business end. And then you have this nice veil which creates like a a taper from um the collar back to the tail. It's nice. You have it This stuff here will move nicely in the water if you're sweeping this across a current for tarpon or stripers or something like that. So, now I just need to finish by covering the hook shank. I'm actually going to tie forward. I'm not worried too much about covering the shank because the chenille will do that work for me. I just want to go in front here right behind the eye. We're using micro chenille today in this golden olive color. And um I want to I want to cut off this is a little bit long, but I want to cut off enough that I can wrap I can do a a thread wrap all the way this way and then and then palmer it back towards the hook eye. So, I'm going to for the sake of like adding a little more body and bulk, I'm going to tie this in right behind the eye and work my way back. You could do this a couple times. In other words, you could lay this back and tie that back in if you wanted to create more bulk. But I'm liking that. So, now that I've tied that in, I'm advance my thread wrap right back behind the eye. Let that be. And here's where it gets it's just a little tricky. This chenille is quite flat. It's kind of pressed flat. It's not You can see the fibers um like I said, they're kind of flat so it's it's not 360. It's sort of like this flat surface. So, I have to work with that as I wrap. I want to make sure that I'm pulling back the fibers here as well. That's a bit of a theme with this fly. I want to make sure I get as enough body on this head section of the worm. I'm adding as I wrap from the collar towards the eye, I'm adding fair amount of pressure. I'm making sure that I create kind of this even width as I go. And in that case, the thread wraps are the the wraps of the chenille are really close together. They're touching wraps and I'm pulling that material back. Always keeping a little bit of pressure on the chenille as I go. You'll notice if you wrap too quickly, you'll notice there's a little gap in the width. You just go back and wrap that again. But even with this flat kind of presentation of the material, I'm creating this rounded surface by wrapping and pulling the material back as I go. I'm going to wrap right behind the hook eye. Pull through. It's going to give me Again, I don't want to let go yet with my tension. I'm going to go up and over like so once twice. I'll do it three times just for the sake of security. Then I'm going to pull that material back like so. It's okay if you capture You can You can neaten this head up a little bit here at the end. Just want to make sure that when I cut that chenille off, it's not going to unspool all the work I just did. So, once that's really nice and captured, I'm lifting up a little bit finding a spot to cut. And you can notice there's a little bit of material sticking out there. I can neaten that out by pulling back and tying it into the this nice kind of neatened section right behind the hook eye. And again, in super clear water on a shorter cast, I can see that bright thread. And that gives me like a reference point where my fly is, which is really helpful. I'm going to whip finish. Tighten down. Cut on slack. And that is >> [music] >> a very fishable, ready to go squirm out of worm fly.





























Comments
(0)No comments yet. Be the first!