


Learn how to tie the Woolly Bugger fly pattern including step-by-step instructions, a video tutorial, pictures, and much more. Improve your fly tying skills here.
Trident Fly Fishing is a full-service fly shop. We spend a lot of time testing gear and writing reviews to give you all of the tools to make your next trip a success. We are not a blog or a review site. 100% of our funding comes from your gear purchases, so if this blog post helps you on your next fly fishing adventure, please support us by buying your gear from us.
Designed by Russell Blessing in Pennsylvania, the Woolly Bugger is one of those patterns that just doesn't fail. Originally designed to imitate hellgramite larva, this fly was used to catch smallmouth bass in Pennsylvania's large rivers. However, since it was created in 1967, the Woolly Bugger has caught many different species in fresh and saltwater. The Woolly Bugger is a fly that you can tie in almost any color or color scheme that you can drum up, and whether you're after bass, trout, pike, or even snook, this fly always seems to produce.
Recipe
- Hook: Daiichi 2461 (size 1/0; size can vary depending on what you're fishing for/imitating)
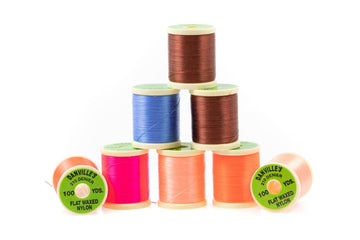
- Thread: UNI-Thread (size: 8/0; color: white)
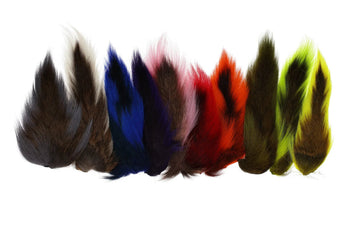
- Tail: Hareline Strung Marabou Blood Quills (color: white)
- Flash: Krystal Flash (color: pearl)
- Body: Hareline Ultra Chenille (color: white)
- Hackle: Hareline Strung Saddle Hackle (color: white)
Step One

Begin the pattern by wrapping the wire from above the hook's bend to below the eye.
Step Two

Next, run the thread along the shank several times to cover the entire length of the wire.
Step Three

Tie on a maribou plume that runs the length of the shank at the tail section.
Step Four

Before moving on to the next step, be sure to clip the forward-facing feather and trim the body with scissors.
Step Five

Secure three inches of Krystal Flash at the material's center, next to the feather. Fold the fabric over and tie-down on the side opposite of the feather.
Step Six

Tie on 4 inches of Ultra-Wire next to the Krystal Flash, on the side nearest you.
Step Seven

Pop the end of the Chenille material off, then tie the material on next to the flash.
Step Eight

Sweep the fibers of the strung saddle hackle back, then tie on by the tip, with the shiny side facing you.
Step Nine

Advance the thread to the eye, then wind the chenille up the shank with no gaps between each rotation. Clip the material off after reaching near the eye, but be sure to leave enough space for the head.
Step Ten

Wind the hackle forward with evenly spaced wraps around the shank, then tie off next to the chenille.
Step Eleven

Going back to Ultra-Wire, wrap along the shank on the spaces between the feathers, careful not to trap any fibers. Pop the wire off below the eye, then clean the head up with a few wraps.
Step Twelve

Complete the tying process by securing a whip finish.
Step Thirteen

Before the Woolly Bugger is ready to hit the water, use the bodkin to help pick out fibers that may have gotten trapped under the thread.

Comments
(0)No comments yet. Be the first!