
Learn how to tie the Spawning Mantis Shrimp including step-by-step instructions, a video tutorial, pictures, and much more. Improve your fly tying skills here.
Trident Fly Fishing is a full-service fly shop. We spend a lot of time testing gear and writing reviews to give you all of the tools to make your next trip a success. We are not a blog or a review site. 100% of our funding comes from your gear purchases, so if this blog post helps you on your next fly fishing adventure, please support us by buying your gear from us.
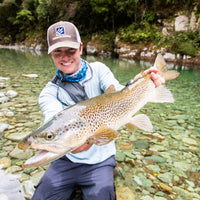
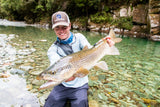
The Spawning Mantis is a stellar pattern for the Bahamas and particularly South Andros. The orange color in the fly attracts the attention of Bonefish on the flats and fishes well in shallow water. The fly's extra weight helps it drop quickly to land in the feeding zone every cast. This pattern can, of course, be used almost anywhere there are shrimp and is a phenomenal pattern on sandy flats. It's also pretty simple to tie with multiple repeating steps so it's a great pattern for novice saltwater tyers and anglers.
Materials:
- Tiemco 811S
- Danville 140 Denier Waxed Flymaster Plus - Orange
- Hareline Crosscut Rabbit Strips - Fl. Orange
- Hareline Bead Chain Eyes - Black
- Hareline Extra Select Craft Fur - Tan
- Hareline Crazy Legs - Rootbeer/Orange
- Loctite Super Glue Brush-On Superglue
Step One:

Start by creating a thread base and tying on the Bead Chain Eyes. Make a slight thread bump to pull your bead chain eyes into on the hook then secure them with a figure-8 tying pattern. Advance your thread to the rear.
Step Two:

Use the Fl. Orange Rabbit Fur to tie in the bottom half of the tail. Strip out the longer fibers and tie the Rabbit Fur in so it comes up the shank. Tying the Rabbit Fur up the shank creates a nice body for the fly.
Step Three:

Tie in the Tan Craft Fur on top of the Orange Rabbit Fur. Strip out the short fuzzy fibers and set them aside to use as makeshift dubbing later. Again, wrap the Craft Fur forward along the shank to add to the thickness of the body of the fly.
Step Four:

Start to dub the body. Utilizing the makeshift dubbing you stripped out of the Tan Craft Fur, wrap a butt section to the fly and create a thread base to tie your legs into.
Step Five:

Tie in the first set of legs. The legs should extend just past the Craft Fur. Tie them on one side, pull the legs over to the other side, measure the legs so they're the same size, then tie them on on the second side. Use scissors to snip the excess legs in the middle of the fly.
Step Six:

Repeat Steps 4-5 to tie down the second set of legs.
Step Seven:

Repeat Steps 4-5 to tie down the third set of legs.
Step Eight:

Continue the dubbing up past the third set of legs. Create a thicker dubbing noodle to continue the taper of the body of the fly and use the dubbing to cover any thread wraps. Continue the taper of the fly right up to the Bead Chain Eyes.
Step Nine:

Wrap a thin dubbing noodle through the Bead Chain Eyes in a figure-8 pattern then use the thread to create a hot spot just behind the hook eye. Finally, whip finish and use Superglue to add durability to the head of the fly.
Questions?
Give us a call here at the shop at (888) 413-5211 or email us anytime at [email protected].
Comments
(0)No comments yet. Be the first!